Code Editor Extended Features (WPF)
Code Editor provides advanced text editing functionality, such as customizable keyboard mapping, HyperText handling, spell-checking integration, printing and exporting, macro recording and playback, and miscellaneous display features.
Keyboard Mapping
While the TextEditor closely mimics the key-mapping common to most of Microsoft's products. It is entirely customizable: you can add or change the behavior of specific keys or even define an entirely different key-mapping.
To assign an action to some key combination, use the following code:
    private void edit_Action()
    {
    ...
    }
    ...
    edit.KeyList.Add(Keys.W | Keys.Control | Keys.Alt, new
    KeyEvent(edit_Action));
This code would make the Ctrl+Alt+W key combination execute the edit_Action method.
Or to pass some object to the key handler:
    private void edit_Action(object o)
    {
    ...
    }
    ...
    edit.KeyList.Add(Keys.W | Keys.Control | Keys.Alt, new
    KeyEventEx(edit_Action), some_object);
To remove some key handler, regardless of whether you have added it yourself or it is the default one, call:
edit.KeyList.Remove(Keys.A | Keys.Control);
The code described before is used to manage the key handling in the default state. In fact, the key handling is slightly more complex than that: the TextEditor's key handling mechanism can be in different states other than the default one. Every state has its own key mapping table. Key mapping for bookmark operations can be a good example: after the user presses the Ctrl+K key combination, combinations Ctrl+K, Ctrl+N, Ctrl+P, Ctrl+L (the list is incomplete) obtain the new meaning. If a key combination is pressed for which there is no assignment in some non-default state, then the state is changed to default, and the combination is evaluated in the new context. TextEditor defines four different non-default states, but you can implement your own:
    edit.KeyList.Add(Keys.W | Keys.Control, null, 0, 5);
    edit.KeyList.Add(Keys.Tab, new KeyEvent(edit_Action), 5, 5);
This code creates a state that is activated by pressing the Ctrl+W key combination, in which the Tab key causes the edit_Action to be executed. The state is changed back to default when the user presses some key other than the Tab key. Until now, we have only examined the cases where you add some new functionality or suppress some existing one. There also might be a case when you want to use an entirely different key mapping, for example, to simulate some other environment your users are familiar with. To accomplish this, it is necessary to completely clear the current key mapping and then assign every function performed by the editor to some key. Note that this means every function: even such trivial things as cursor navigation and insertion of a new line, are performed according to the key mapping.
For example, the following code assigns the editor's key-mapping to a single action defined: "Select All", which is assigned to the Ctrl+X key combination.
    edit.KeyList.Clear();
    edit.KeyList.Add(Keys.X | Keys.Control,
    ((EventHandlers)edit.KeyList.Handlers)SelectAllEvent);
URL handling
The TextEditor can be set up to handle pieces of text that look like some kind of URL by setting the HighlightHyperText property to true. The handling consists of highlighting those text pieces and processing clicks on them. By default, clicking the URL causes the operating system default action to be performed (i.e., launching a browser or an email client). However, you can override this behavior by assigning the JumpToUrl event handler.
    private void edit_JumpToUrl(object sender, UrlJumpEventArgs e)
    {
        if(is_our_url(e.Text))
        {
            process_url(e.Text);
            e.Handled = true;
        }
    }
Spellchecker Interface
The TextEditor supports the spell-as-you-type spell checker integration. To enable spelling for the editor, set its CheckSpelling property to true and assign the WordSpell event handler.
The following artificial example considers any word longer than three characters to be correct:
    private void edit_WordSpell(object sender, WordSpellEventArgs e)
    {
        e.Correct = e.Text.Length > 3;
    }
    ...
    this.edit.WordSpell += new WordSpellEvent(this.edit_WordSpell);
Incorrect words are displayed with the wiggly underline (the default color is red, but it can be changed using the SpellColor property). In real-life scenarios, you need to use some third-party software/dictionary to check the text. Another alternative is using a word-list file. Many of them, including Public Domain or free ones, can be found on the Internet. Refer to a Miscellaneous quick start project, which has one of these dictionaries.
Another helpful feature supported by TextEditor is AutoCorrect, allowing you to auto-correct words when typing. To enable this feature, you need to set the AutoCorrection property to true and handle the AutoCorrect event to provide replacements for words that were typed incorrectly.
Printing and Exporting
TextEditor includes support for printing, print previewing, and exporting to RTF and HTML.
Exporting can be performed as simply as this:
edit.SaveFile(FileName, new RtfExport());
Printing tasks are performed and configured via the Printing property of the TextEditor.
For example, to show the print preview dialog, call:
edit.Printing.ExecutePrintPreviewDialog();
TextEditor control supports adding user-defined information while printing.
To add some text to the footer:
edit.Printing.Footer.CenterText = "draft";
Text in headers and footers can contain substitution tags. The standard ones are: [page], [pages], [date], [time] and [username].
Macro Recording and PlayBack
TextEditor has macro recording and playback capabilities. It allows recording sequences of keyboard commands and playing them later. Note that mouse input is not recorded.
This feature enables you to store a set of frequently used editing commands. Set MacroRecording property to start/finish macro recording. Use the PlayBack method to repeat the stored command sequence.
White-space Display
It is sometimes desirable for the user to see the codes that influence the text's layout and are usually invisible. These codes are space, tab, end-of-line, and the end-of-file (not really a code) and are often collectively referred to as white space. The TextEditor has the option to display them and control their appearance.
The display of the white space is enabled using the Visible property. The color used to display white-space codes is determined by the SymbolColor property, and the characters used to display those codes are determined by EofSymbol, EolSymbol, SpaceSymbol, and TabSymbol properties.
Line Separator
It is possible to have lines of the editor to be separated by thin horizontal lines and to have the current line highlighted. This behavior is controlled by the LineSeparator property.
The following options are available:
HighlightCurrentLine specifies that the current line in the editor will be highlighted using the HighlightColor for the background.
HideHighlighting specifies that the highlighting of the current line should be hidden when the editor loses focus.
SeparateLines specifies that a thin horizontal line of LineColor should be drawn between each line of text.
SeparateWrapLines specifies that each visual line of text produced as a result of word-wrap should be separated in the same manner as separate lines (works only if the SeparateLines option is also specified).
SeparateContent specifies that a line separator will be drawn between sections of the code (for example, between methods) if TextEditor control is associated with SyntaxParser supporting this feature.
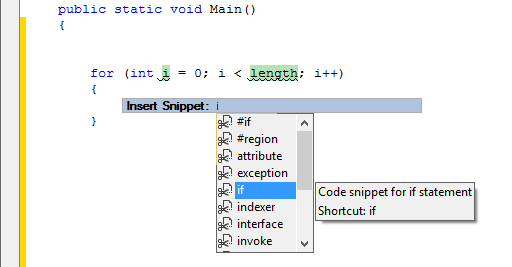
Code snippets
The code snippets are the next code completion provider, allowing to insertion of frequently used fragments of code. Code snippets can be inserted into the editor by pressing the Tab key after the snippet shortcut or by executing the code snippet popup window with Ctrl + K + X key sequence, or activated programmatically by calling the CodeSnippets method of the TextEditor.
The purpose of the code snippets is to permit the user to quickly enter one of the predefined fragments of text. If the code snippet has fields declared, the editor allows modifying their values, causing updating field values inside the whole snippet.
The following picture illustrates the usage of the code snippets.
Hidden and Read-Only Lines
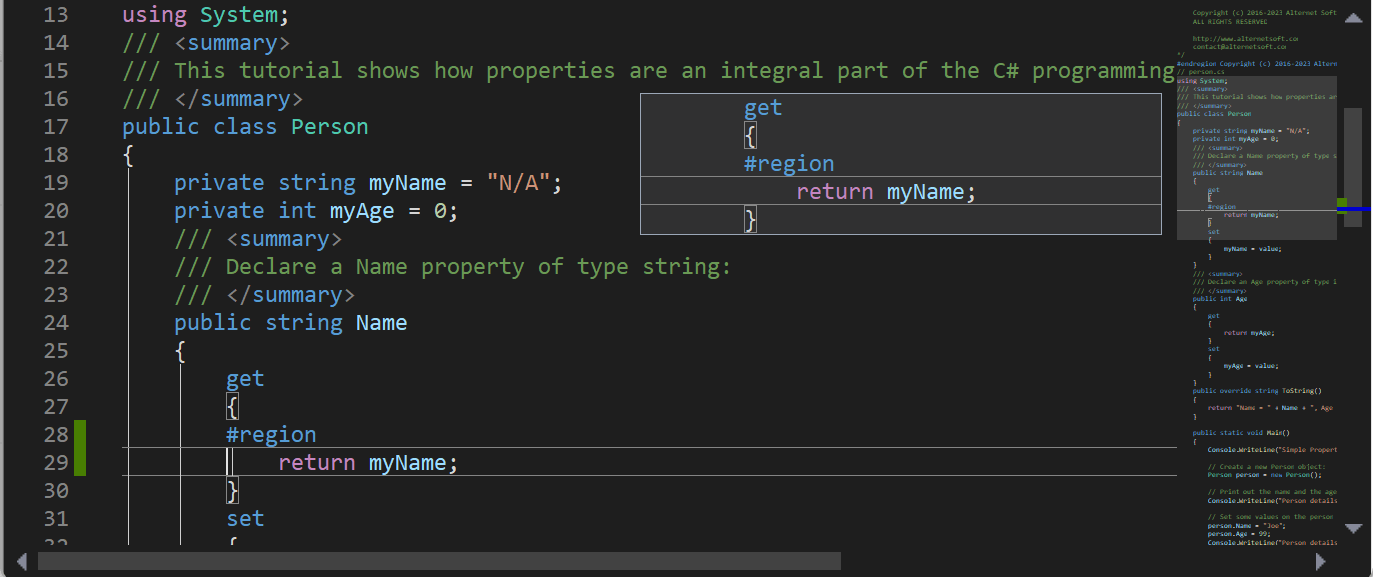
TextEditor control can mark certain lines to be read-only or hide them, so the user can't see them. This can be achieved by using SetLineHidden and SetLineReadonly methods. For hidden lines to take effect, the AllowHiddenLines property needs to be set to true. Read-only lines can be made visually different from editable lines by setting ReadonlyBackColor property. Sometimes it's required to mark certain lines to be both hidden and read-only. This way, they can not be deleted if the user selects the outer block containing them and tries to delete it.
Structure Guidelines
TextEditor control can display dashed lines between syntax blocks for some parsers (Roslyn-based, TypeScript, and some advanced parsers), helping the user to better understand the structure of the document being edited. This behavior is controlled by a Parser and can be switched off by the StructureGuideLines parser option.
Minimap
A Minimap (code outline) gives you a high-level overview of your source code, which is useful for quick navigation and code understanding. A file's minimap is shown on the right side of the editor. You can click the shaded area to quickly jump to different sections of your file.